What You'll Learn
- Configure a clean Elev8 chart without enabling every tool at once.
- Follow the seven-step Elev8 decision sequence during a live session.
- Build a simple daily preparation, execution, and review routine.
Most new users make the same mistake: they turn on every tool, react to every signal, and lose sight of the actual setup. This 7-day plan gives you a clean learning path that starts with the core Elev8+ reversal language, then introduces the newer location, extension, zone, and continuation tools one job at a time.
THE GOAL OF WEEK 1
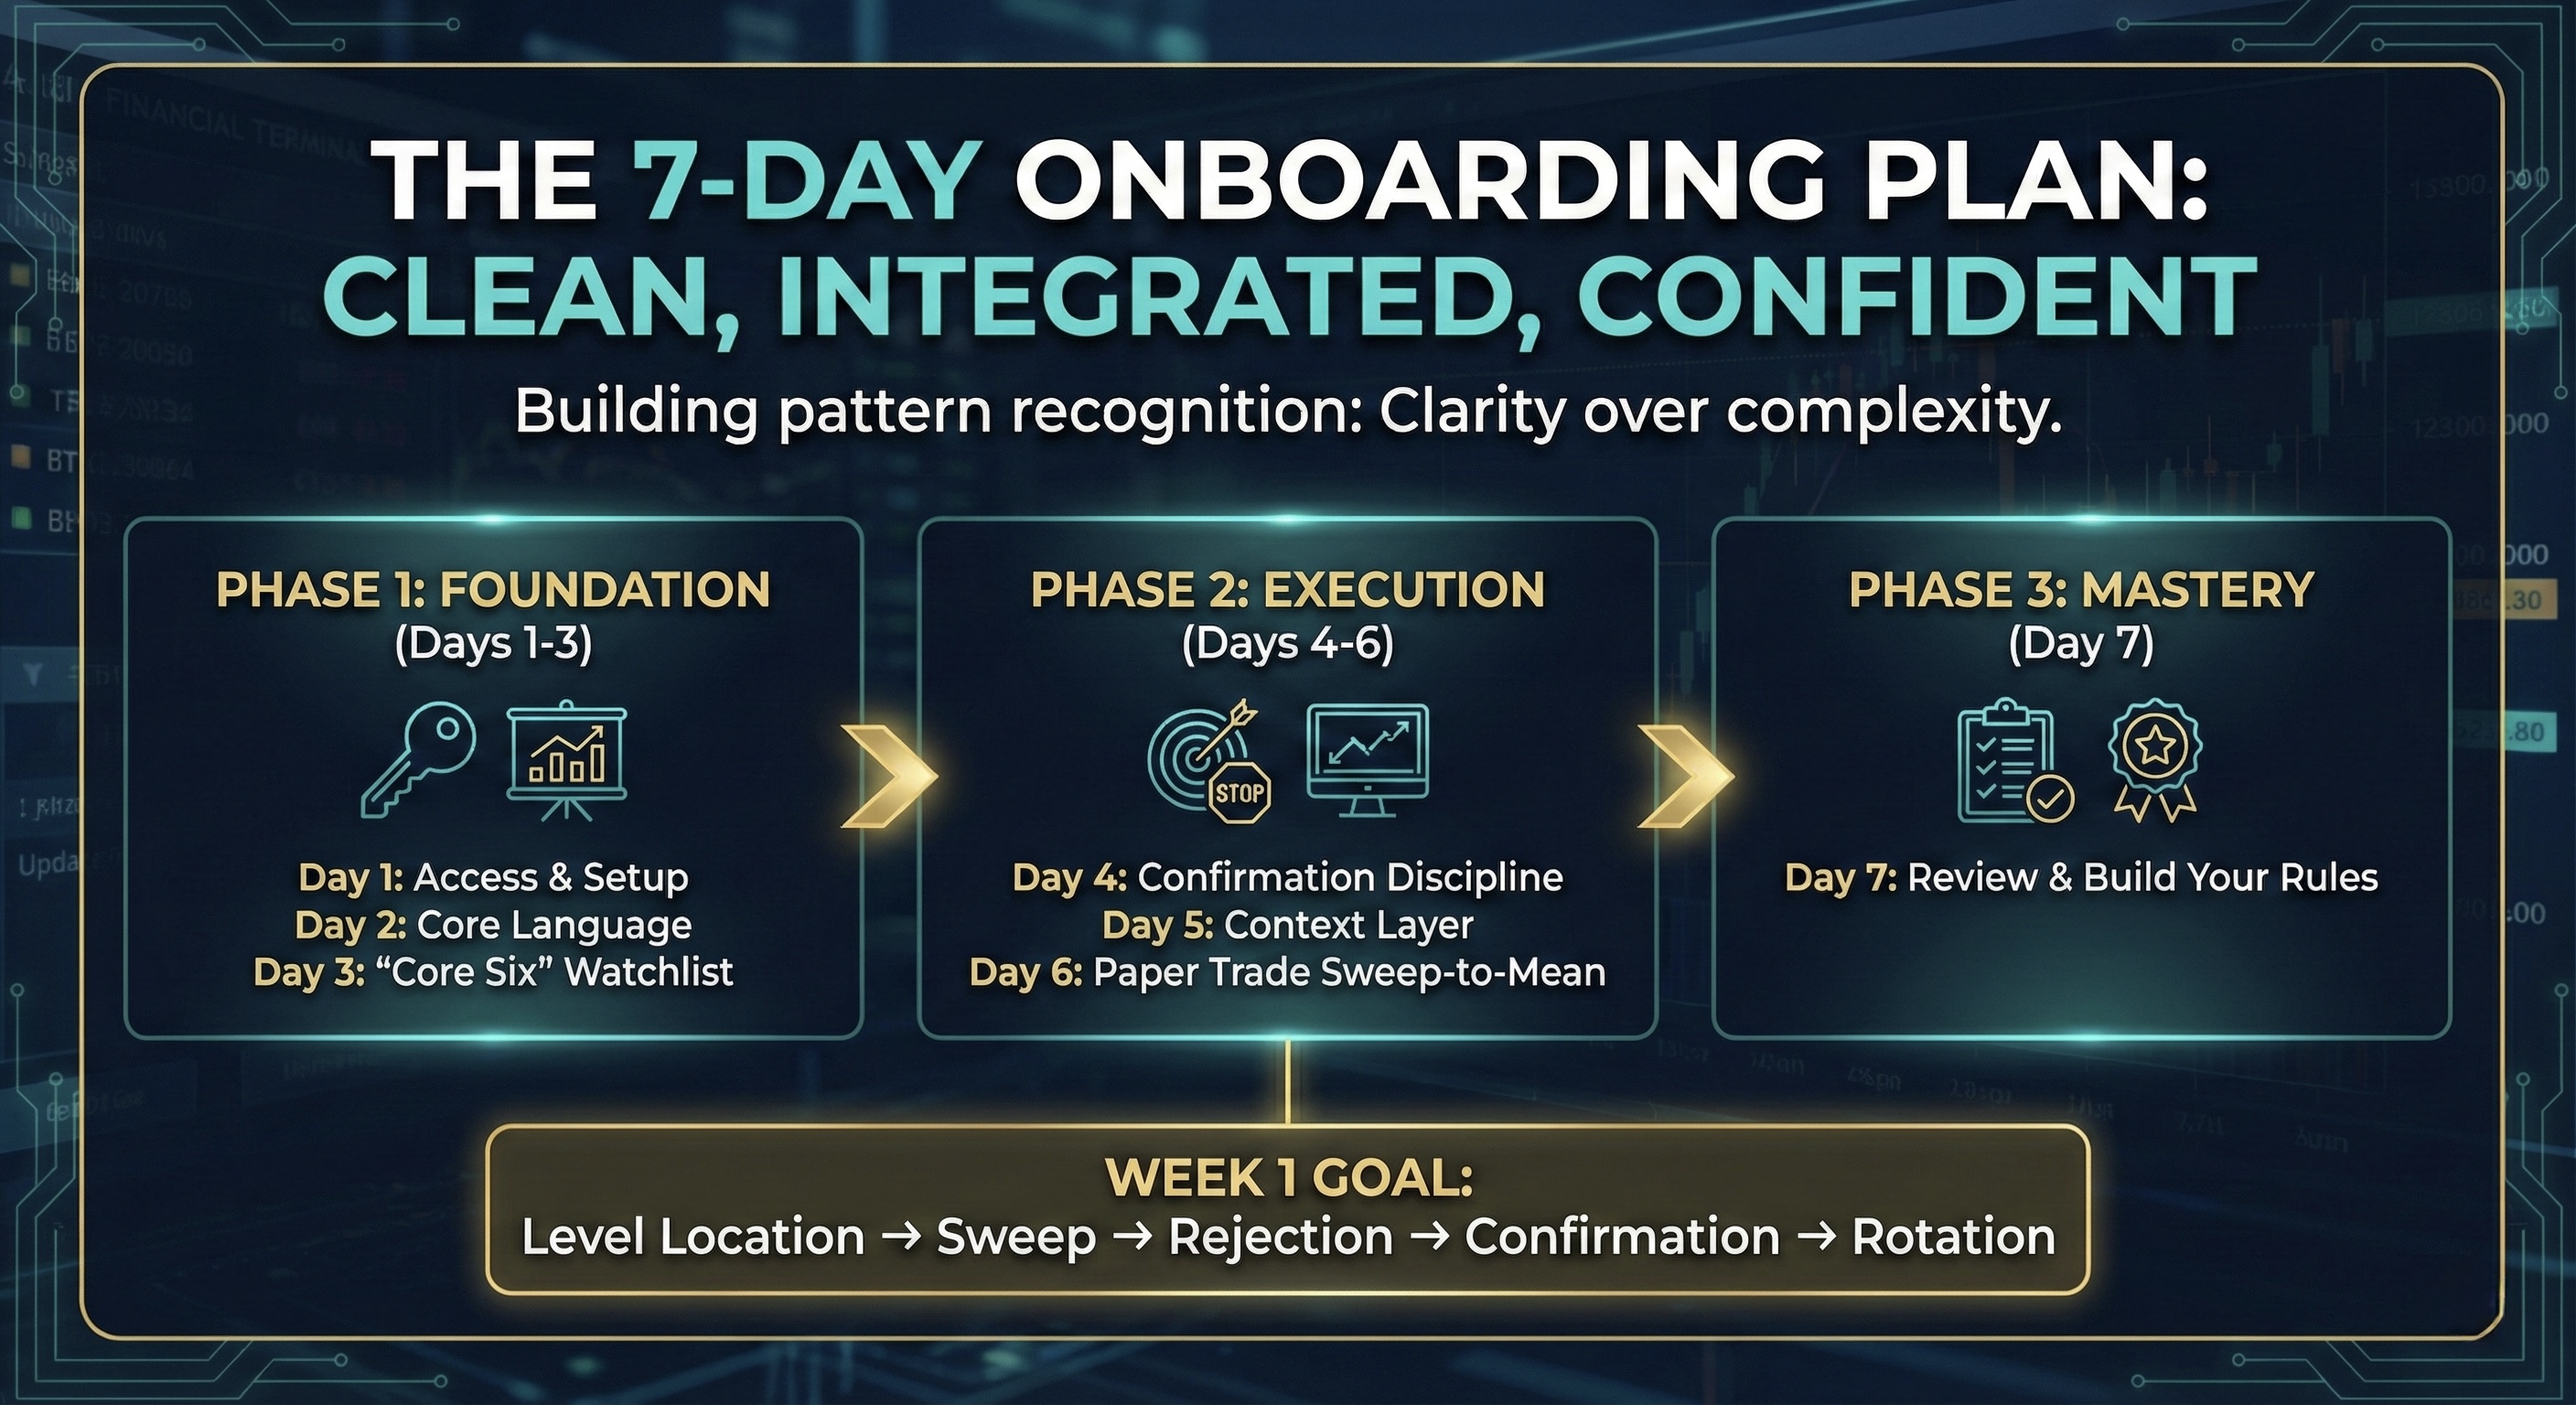
You are not trying to “trade perfectly.” You are building pattern recognition: Location → Sweep or Acceptance → Rejection / Displacement → Confirmation → Invalidation → Target.
IMPORTANT: Elev8+ Is a Modular Indicator Suite
The Elev8+ system can be used with a single indicator, but the full suite separates the trading process into clear jobs. The goal is not to stack every tool—it is to use the right tool for the question you are trying to answer:
- Elev8+ Pro: Signal + execution layer (Triangles/LS and sweep context tell you when a mapped setup is confirming).
- Market Map + VWAP Deviation: Location + extension layer (session liquidity, HTF references, VWAP, and 2–3 SD stretch tell you where price matters and how extended it is).
- Market Extremes + Reversal Blocks: Exhaustion + reaction-zone layer (divergence/extremes identify reversal conditions while validated RBs refine where a retest may be defended).
- Momentum Gaps + Real FVG: Displacement + structure layer (impulse/FVG/OB context and structure-validated FVGs help separate strong expansion from random gaps and map cleaner retests).
For Week 1, keep the chart minimal on purpose. Start with Elev8+ Pro and the levels you actually trade, then add one context tool only when you understand what new decision it improves.
What You’ll Do Each Day
- Day 1: Installation + minimal chart setup
- Day 2: Learn sweep vs acceptance and confirmation
- Day 3: Build your priority liquidity watchlist
- Day 4: Practice displacement, invalidation, and targets
- Day 5: Add one specialized context layer
- Day 6: Paper trade reversal and retest execution
- Day 7: Review + write your personal rules
Day 1: Installation & Minimal Chart Setup
Confirm your TradingView username is registered. Log in to TradingView and check the Invite-Only Scripts section. Click the Elev8+ indicators you want to install to add them to your chart.
If the script is missing, see the Troubleshooting section at the bottom of this post (Issue #1).
Go into the indicator settings and apply the Minimal Preset so you can learn the core language before adding specialized context.
- Enable: Elev8+ Reversal Signals (Triangles/LS) and Liquidity Sweep Boxes + Labels.
- Enable: Only the major Sweep Levels+ you actually plan to trade (PDH/PDL and relevant session highs/lows).
- Leave Off: Extra visual layers until you understand what each one contributes to location, confirmation, or trade management.
Your only job today is to have a clean, working chart showing major liquidity and basic confirmation. (Market Map, Market Extremes, VWAP Deviation, Reversal Blocks, Momentum Gaps, and Real FVG become useful after the core language is familiar.)
Day 2: Learn the Core Language (Sweep vs Acceptance)
- Study the legend: Learn what the Triangle, LS labels, and Sweep Boxes represent (you can see the full legend here: https://elev8plus.trading/blog/chart-legend-guide).
- Scroll back: Review the last 5 trading days on a 5-minute chart.
- Identify: Find 10 failed breakouts where price sweeps/reclaims and begins displacing away, and 10 acceptance examples where price breaks a level, holds beyond it, and continues.
- The rule: Practice separating a liquidity event from a confirmed reversal. A wick through a level is not enough; wait for reclaim, failed continuation, displacement, structure shift, or another clear sign that the breakout actually failed.
Day 3: Build a Priority Liquidity Watchlist
The biggest execution upgrade is deciding which liquidity actually matters before price gets there. Do not give every plotted line equal weight.
- PDH / PDL (primary daily external liquidity; add Weekly High/Low when nearby)
- Overnight / Session Highs & Lows (ONH/ONL plus Asia/London levels relevant to your session)
- Nearby HTF Structure (meaningful 1H/4H swings or other major levels that can change the trade thesis)
Go into your Sweep Levels+ settings and emphasize only the levels that can realistically affect the current session. If a level is far from price or structurally minor, it should not compete visually with the levels you actually plan to trade.
Tip: Market Map can handle much of the session-liquidity framework if you prefer a cleaner chart, while Sweep Levels+ can be used selectively for additional references. The rule is the same—only keep what matters today.
Day 4: Confirmation & Invalidation Discipline
After a qualified reversal, the first objective is usually the nearest realistic value or internal-liquidity reference—not automatically the far side of the range.
- Stop practice: Mark the structure that must hold for the reversal thesis to remain valid. The sweep extreme is often your invalidation point, but not because every wick automatically defines the correct stop.
- Target practice: Identify VWAP (Volume Weighted Average Price), internal liquidity, mid-range, or another mapped value reference as your first objective.
- The rule: Compare realistic reward with structural risk before entry. A 2× target (2R) can be a useful benchmark, but do not force a trade or target when nearby structure makes the available reward too small.
Optional confluence: VWAP Deviation and Market Extremes help judge extension; Reversal Blocks / Real FVG refine retest structure; Momentum Gaps helps map displacement and rotation checkpoints. Use these as separate evidence—not as reasons to force a trade.
Day 5: Add One Specialized Context Layer
Once you feel comfortable, add one specialized layer that improves a specific decision. Do not turn on everything just because it is available.
- Option A (Location): Add Market Map to organize PDH/PDL, session liquidity, ORB context, VWAP, and the next major objective.
- Option B (Extension): Add Market Extremes or VWAP Deviation to judge exhaustion, divergence, and whether price is genuinely stretched enough for a reversal thesis.
- Option C (Zones): Add Momentum Gaps, Reversal Blocks, or Real FVG to study displacement-created zones, retests, invalidation, and continuation structure.
- Option E (Trend Context): Add the EMA Ribbon and the EMA Trend Cloud inside Elev8+ Pro when you need a simple directional/regime filter before fading a strong trend.
If clarity decreases after adding a layer, revert to the Minimal Preset. A tool should improve one decision; if it only adds visual noise, it is not helping your execution.
Day 6: Paper Trade Confirmation + Retest Execution
Using your checklist (Location, Liquidity Event, Reaction, Confirmation, Invalidation), paper trade the setup.
- Entry: Use the next candle after Triangle/LS confirmation for the aggressive model, or wait for a structured retest if one forms.
- Stop: Beyond the structure that invalidates the reversal thesis.
- Exit: Use a realistic first objective at internal liquidity, VWAP, mid-range, or another mapped value zone. Do not optimize runners today. Focus only on entry quality and whether your thesis was structurally correct.
Optional confluence (keep it simple): if you added one tool on Day 5, use it only for its assigned job—location, extension, or zone quality. Do not let a new indicator rewrite your execution rules mid-session.
Day 7: Review & Build Your Rules
Use the Trading Journal to review your Day 6 trades and extract 3 non-negotiable rules you will follow next week.
- Example: “I only trade Elev8+ reversal signals when meaningful liquidity, rejection/acceptance behavior, and structural confirmation agree.”
- Example: “I use RB/FVG/VWAP or other context only when it adds independent information, and I exit when the structure that validated the trade fails.”
Your rules should come from your own reviewed execution data: which locations, confirmations, entries, invalidations, and management decisions you can repeat consistently.
Elev8+ Troubleshooting & FAQ
- Check username: Confirm your TradingView username is correct (spelling and case matter).
- Refresh: Log out and log back into TradingView, then check Profile → Invite-Only Scripts.
- Toggles: Confirm you loaded the correct indicator and enabled the signal / zone feature you actually want to study; not every Elev8+ tool is designed to print reversal triangles.
- Chart type: Use standard candles when learning price-action logic so synthetic chart construction does not distort the structure you are studying.
- Solution: Reduce the number of simultaneous level and zone layers. Keep only nearby major liquidity, then add one specialized indicator when it has a specific job.
- Best practice: Your goal is not to display every feature—it is to see the few locations, zones, and confirmations that matter to today’s playbook.
Closing Framework
Clarity over complexity. Week 1 is about learning the sequence: location, liquidity event, rejection or acceptance, displacement, confirmation, invalidation, and target.
Quick Checklist
- I can configure a clean Elev8 chart without enabling every tool at once.
- I can follow the seven-step Elev8 decision sequence during a live session.
- I can build a simple daily preparation, execution, and review routine.
Before You Move On
Apply the lesson on your own chart or dashboard and confirm that you can explain each step without relying on the article.
Common Mistakes
- Turning on every feature before learning the core chart language.
- Moving on without testing the lesson on a clean chart.