
What You'll Learn
- Prepare key liquidity and event context before the session.
- Use defined execution windows without forcing a trade.
- Review decisions, rule adherence, and outcomes consistently.
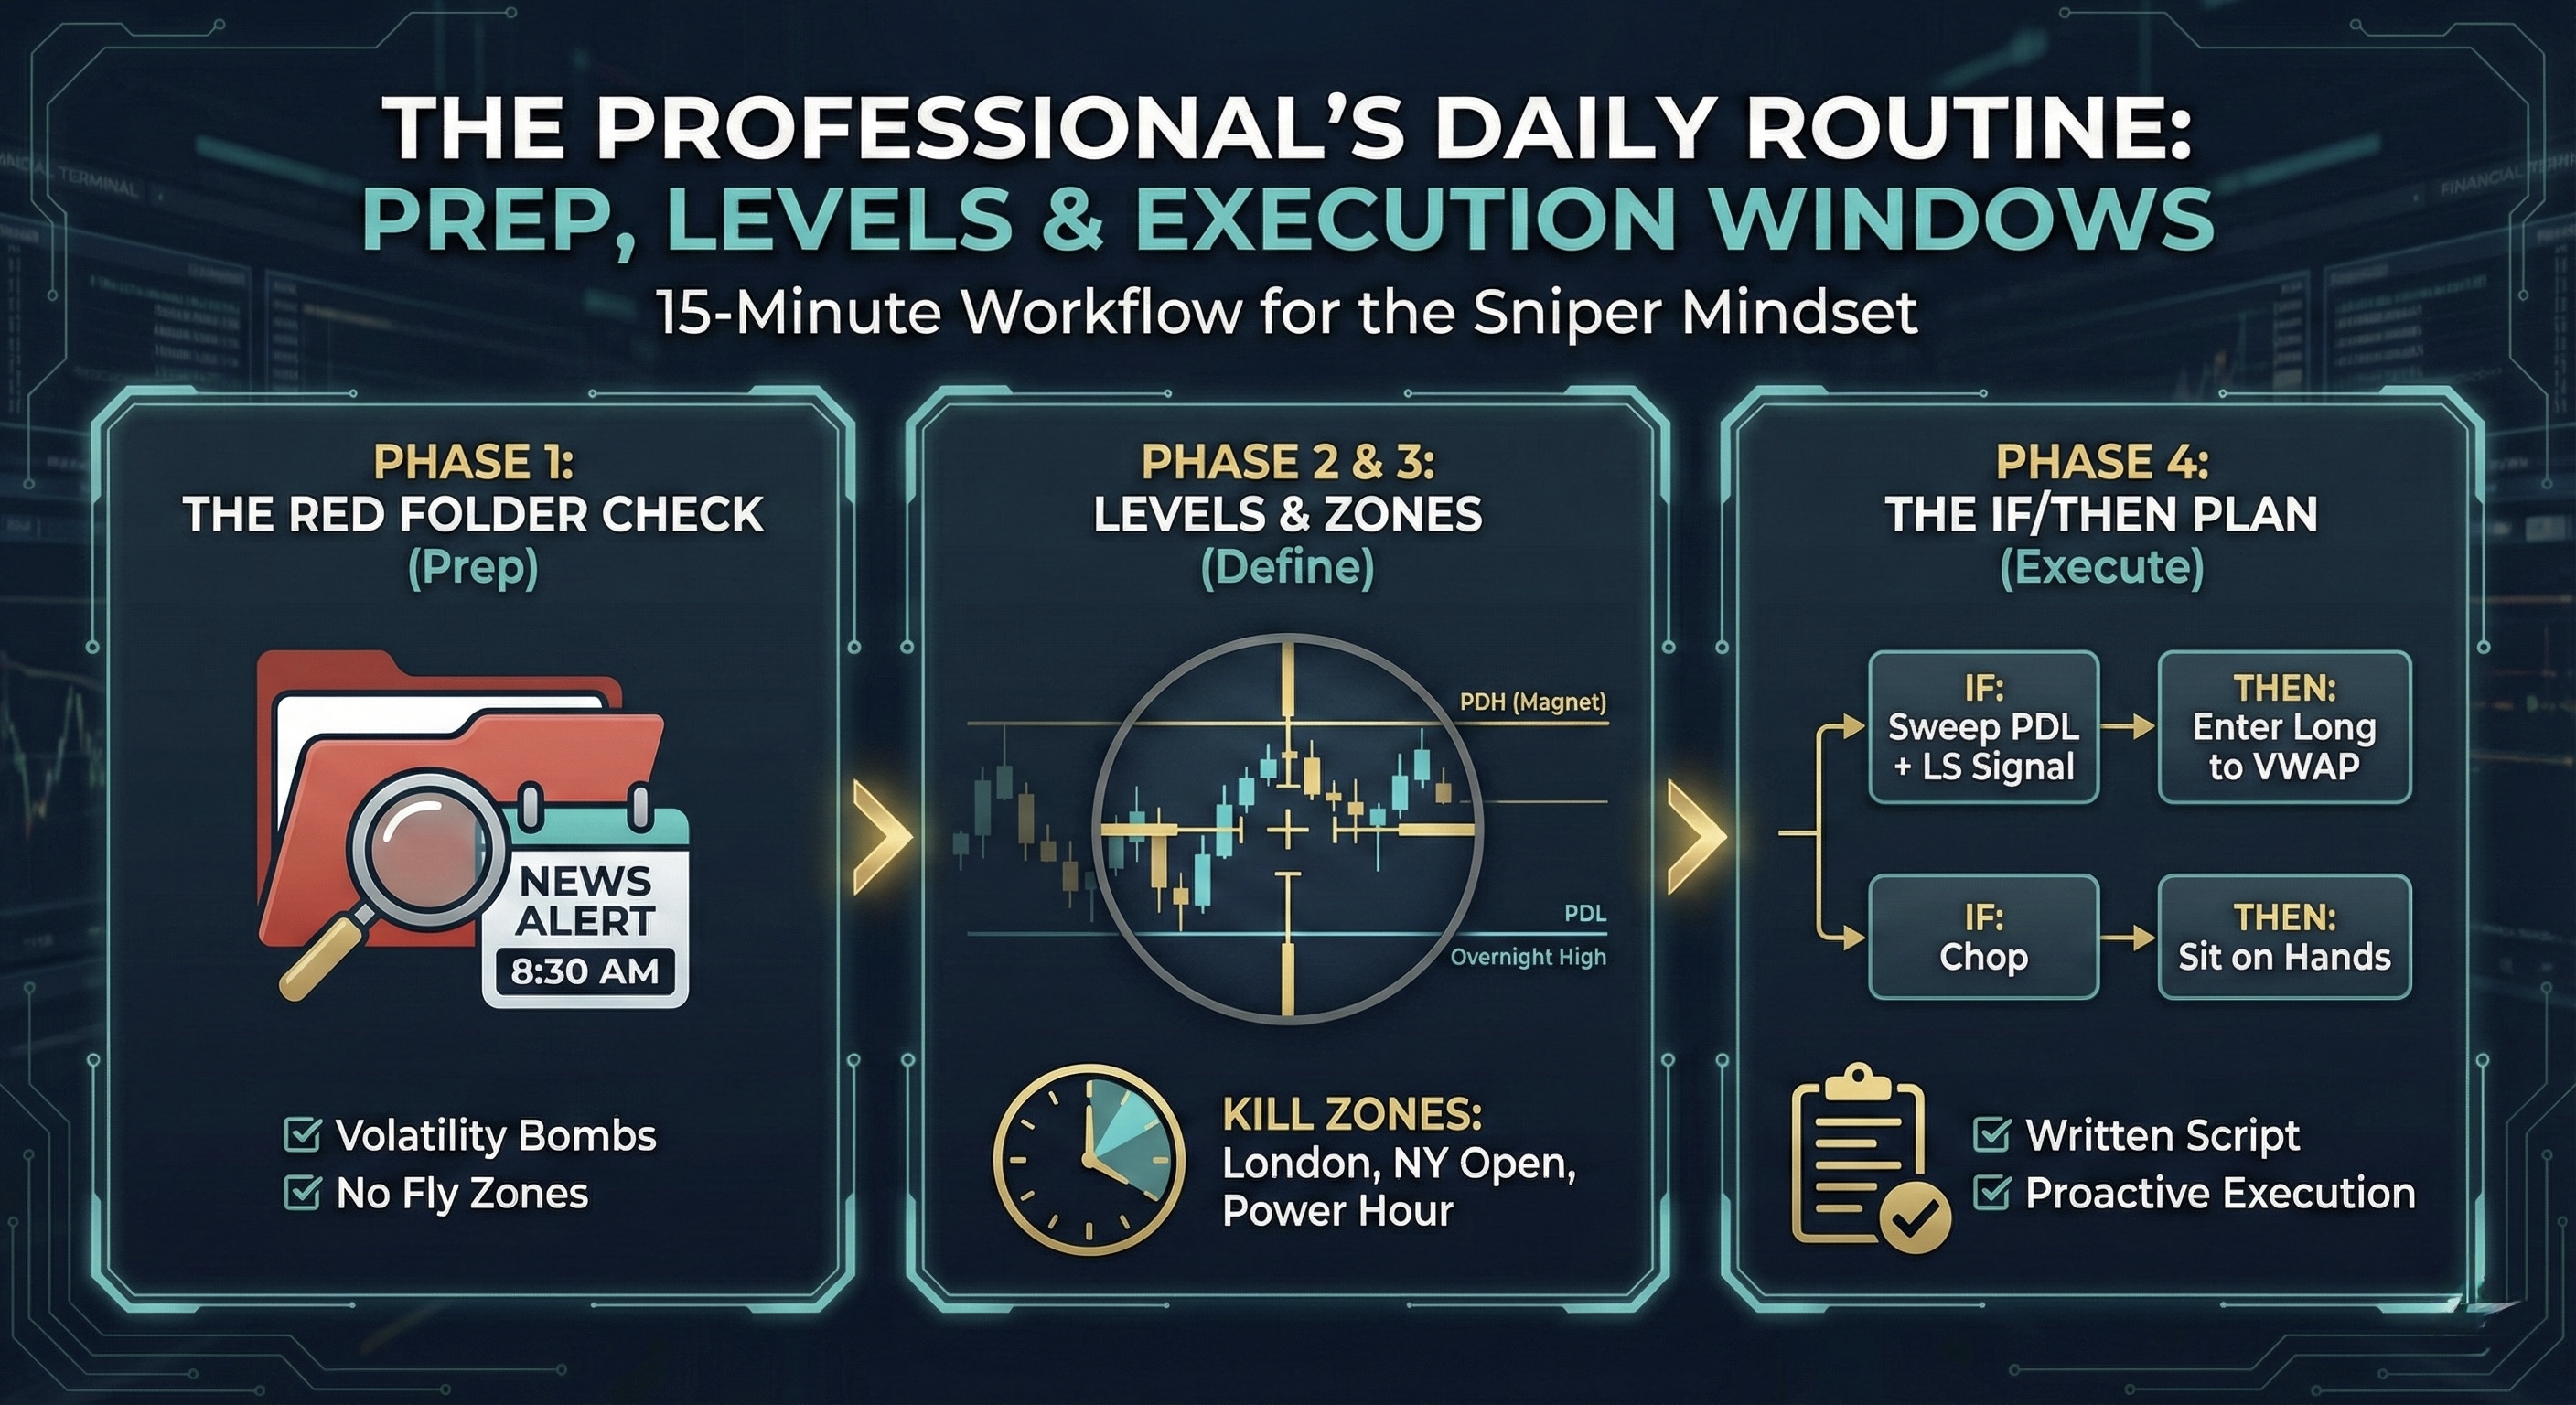
The Professional’s Daily Routine: Prep, Levels & Execution Windows
Consistent traders do not wait for the open to decide what matters. They prepare the important levels, scheduled events, likely liquidity paths, and invalidation conditions before price reaches them.
Elev8+ is designed to reduce decision noise, but it works best inside a repeatable routine. This guide breaks down a focused 15-minute workflow for identifying the levels that matter, defining the windows you actually want to trade, and entering the session with a clear "Sniper Mindset" instead of reacting to every candle.
The 15-Minute Promise
The goal is not to force every trading day into exactly 15 minutes of preparation. The goal is to make the core plan simple enough that you can identify news, location, scenarios, risk, and targets without turning preparation into analysis paralysis.
This workflow works with Elev8+ Pro alone, but the full suite gives each part of the routine a clearer job: Market Map identifies session liquidity, VWAP context, and major HTF levels, Market Extremes shows whether price is genuinely extended or still trading normally, and Momentum Gaps helps identify displacement, RB/FVG structure, and realistic rotation or continuation objectives.
Phase 1: The "Red Folder" Check (Time: 2 Minutes)
Before building a technical plan, know whether scheduled data or a central-bank event could materially change volatility. Check a reliable economic calendar and note the exact release times that matter for the instrument you trade.
- CPI / PPI / FOMC / NFP: Treat major scheduled releases as separate risk environments. Decide in advance whether your plan allows holding through them.
- 8:30 AM or 2:00 PM EST: These are common release windows, but always verify the actual calendar rather than assuming a fixed event is scheduled.
The Rule
Do not initiate a level-based trade immediately before a scheduled high-impact release unless trading that event is specifically part of your tested plan. After the release, let volatility establish structure first; the reaction may create a sweep, reclaim, breakout, or entirely new set of levels.
Phase 2: The "Core Six" Levels (Time: 5 Minutes)
Sweep Levels+ removes much of the manual line drawing, but displaying every possible level can create more noise than information. Your execution chart should highlight the few levels most likely to matter for the current session.
Start with these level groups, then hide anything too far from current price to affect the session plan.
- 1. PDH (Prior Day High) — A major daily external-liquidity reference.
- 2. PDL (Prior Day Low) — A major daily external-liquidity reference.
- 3. Overnight High — Important morning-session liquidity and breakout context.
- 4. Overnight Low — Important morning-session liquidity and breakout context.
- 5. Weekly High/Low — Higher-timeframe liquidity when price is close enough to interact with it.
- 6. Session High/Low — Asia and London extremes that can become sweep, breakout, or target levels.
Pro Tip: Use the "Visual Settings" to give higher-priority levels stronger visual weight, and lower-priority levels lighter styling. Visual hierarchy should make the important decision points obvious at a glance.
Optional: Use Market Map as a “sanity check” so a minor intraday pivot does not receive the same weight as meaningful external liquidity. The goal is a clean execution chart that still respects session structure, VWAP, and nearby HTF levels.
Phase 3: Define Your "Kill Zones" (Time: 3 Minutes)
Liquidity and volatility are not distributed evenly throughout the day. Certain session transitions repeatedly produce more opportunity, but the time window itself is only context—the setup still has to confirm.
- Goal: Watch how London interacts with the Asia High/Low and other nearby external liquidity.
- Why: The transition can produce either a failed liquidity run or genuine acceptance beyond the Asian range.
- Goal: Watch how the cash open interacts with Overnight, Prior Day, ORB, and premarket levels.
- Why: The open frequently produces strong displacement, liquidity sweeps, and failed breakouts—but it can also establish real continuation.
- Goal: Watch for late-session continuation, liquidity runs, or rotation back toward value.
- Why: Closing-session participation can increase as traders and larger participants adjust or close positions before the cash close.
⚠️ The "Dead Zone": NY Lunch (12:00 PM – 1:30 PM EST)
Be more selective here. Participation can slow and ranges can compress, which often reduces the quality of momentum and sweep follow-through. If your tested plan performs poorly during lunch, use the window to journal, review, or wait for a cleaner setup.
Optional: Use Market Extremes to reduce “random clicking” inside ordinary mid-range conditions. The time of day can create opportunity, but location and extension still matter more than the clock by itself.
Phase 4: The "If/Then" Plan (Time: 5 Minutes)
A plan is not a prediction ("I think NQ goes up"). A plan is a conditional response that defines location, confirmation, invalidation, and the next objective before the setup appears.
- Scenario A (Bullish): "IF price sweeps the PDL, reclaims it, and confirms with an LS/structure shift, THEN I look for a long toward internal liquidity or VWAP with invalidation below the sweep structure."
- Scenario B (Bearish): "IF price runs the Overnight High into the Open, fails to accept above it, and displaces lower, THEN I look for a short toward the next internal-liquidity or value target."
- Scenario C (No Trade): "IF price remains in mid-range chop with no meaningful sweep, breakout, or displacement, THEN I do nothing until structure improves."
Write the scenarios down or keep them in a consistent premarket checklist. The value comes from deciding what evidence you require before the market is moving quickly and emotions begin influencing the decision.
Optional: Use Momentum Gaps to define structural checkpoints and targets. Instead of guessing where to take profit, map likely reactions through VWAP, internal liquidity, RB/FVG zones, and the next external-liquidity objective.
Summary: The Daily Checklist
- ✅ News Checked? (Exact high-impact release times are known).
- ✅ Core Six Levels Loaded? (Only nearby, relevant liquidity is emphasized).
- ✅ Time Window Open? (The session context fits your tested playbook).
- ✅ If/Then Scenarios Written? (Location, confirmation, invalidation, and targets are already defined).
This routine turns the session from a series of reactions into a set of planned decisions. Plan the conditions first, then trade only when the market proves them.
Quick Checklist
- I can prepare key liquidity and event context before the session.
- I can use defined execution windows without forcing a trade.
- I can review decisions, rule adherence, and outcomes consistently.
What Invalidates the Setup?
Stand aside when meaningful location, the expected price response, confirmation, clearly defined structural risk, or a realistic target is missing. A tool or signal by itself does not complete the trade thesis.
Common Mistakes
- Choosing size before defining structural invalidation.
- Improvising entries, exits, or rules after the trade begins.
Next Recommended Lesson
Trade Management & Exit Strategy: Partials, Trailing & When to Cut →